Hey there! It’s Becca here. Glad you stopped by the blog today cause we’re dishing up some super practical decor tips that you won’t want to miss.
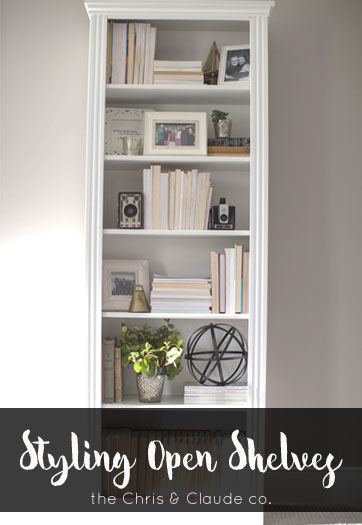
Have you ever seen a picture of a perfectly styled bookcase and wanted your own shelves to look that amazing? I think we’ve all been there. Arranging a bookshelf that looks pretty can be tricky, but hopefully be the end of this post you’ll have all the tools you need to go style those shelves of yours to perfection. Let’s do this!
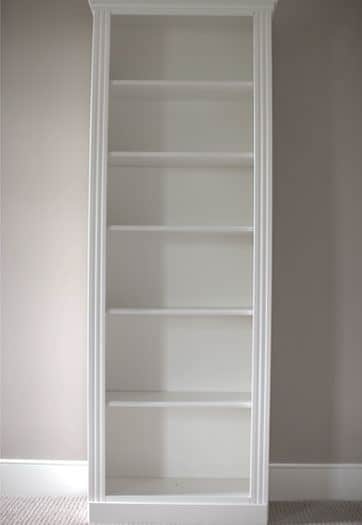
Step 1: Start with completely empty shelves. As simple as this sounds, it’s actually important. Don’t just rearrange what’s already there. Take everything off. And maybe dust while you’re at it too. 😉
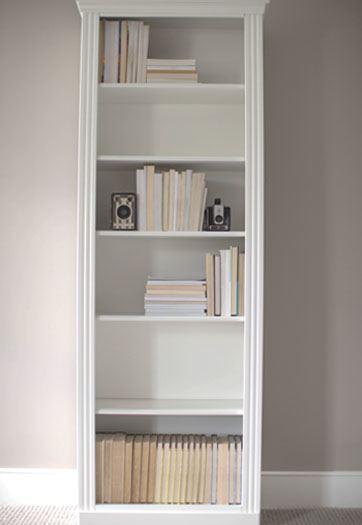
Step 2: First thing on your shelf should be books 🙂 So pile ‘em on!

1. When you’re adding books to your shelf, consider flipping them around so that the pages are showing instead of the bindings. Especially for those of you who loves neutrals, this way of arranging your books will be perfect! Plus the exposed pages add so much great texture 🙂
2. Usually it looks nice to organize objects in groups, so section your collection of books into a few groups then place them on your shelves.
3. Lay some books horizontally. This helps to break up all the vertical lines created by the books that are standing upright. Doing this also gives you different platforms of varying heights for cute little objects to sit on 🙂 We’ll talk more about that when we get to Step 7.
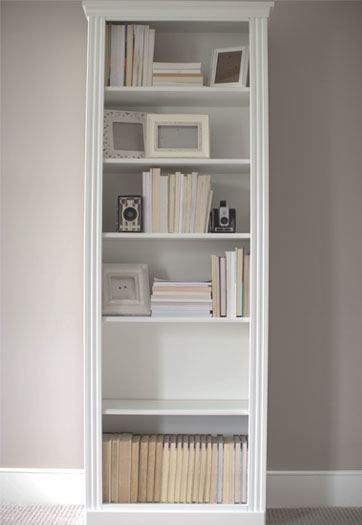
4. Remember to keep a balanced look. Take a look at the picture above. Notice how there are books on the top, middle, and bottom shelves. The larger clump of books is at the bottom, which is easy on your eye because it keeps the bookshelf from looking top heavy or out of proportion. Also take note of how the books on the top shelf are placed on the opposite side of the bookshelf than the books on the middle shelf. This helps the shelves to look evenly balanced.

Step 3: Find some unique treasures around your house to use as bookends. Instead of feeling like you have to go out to Target (not hating on Target at all – I love that place! :)) to buy some fancy bookends, just grab a few cute (and kinda heavy) objects that are sitting around your house. I used two antique cameras that my sister had 🙂 Thanks sista!
Step 4: Next set up some frames.
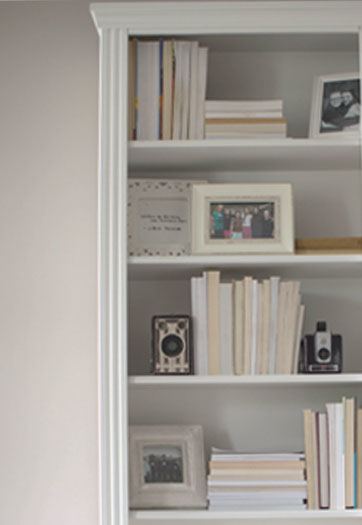
1. Layer your frames! This adds depth and intrigue to your bookcase.
2. Add personal photos in the frames. Stick your favorite family photo in one and a picture with your bestie in another. When you use photos like this, your beautifully styled bookcase becomes even more special because it is unique to you.
3. To contrast the busyness of the photos that you just put up, add a simple printed quote in the next frame.
4. Again, make sure all your frames aren’t clumped together on one shelf or in one corner of the bookcase. Place them opposite each other to create balance – just like with the books

Step 5: You should definitely display those gorgeous old books that you have sitting around (oh ya know, the ones that are almost falling apart :)). Antique books add so much personality!
Step 6: Now stack up some cute magazines or photo books to add variety and some different texture. On a side note, the magazines used on these shelves are the wonderful Set Apart Girl Magazines. Ladies, do yourself a favor and go subscribe to these inspiring, beautiful, and truth-filled treasures.
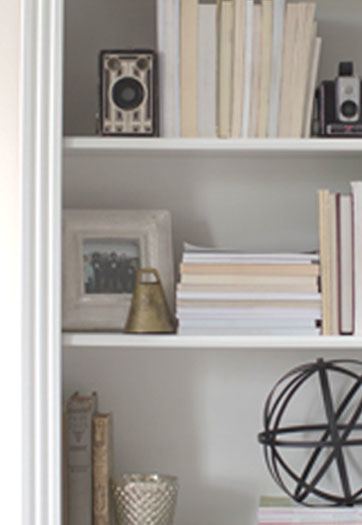
Step 7: Next add some pretty little objects to your bookcase. Be creative here! Candles, geometric objects, figurines, little antique beauties of all shapes and sizes, glass jars filled with anything and everything – Honestly, you can find so many random accessories around your house that will look amazing on your shelves.
1. Remember that things look best arranged in groups of odd numbers. In the picture above notice the 3 metallic candle jars? And how about the bell + the black geometric ball + the gold pyramid? Pairs are also nice (two black cameras)
2. Another key to decorating bookshelves is variation of height.
3. Top the stacks of books with something cute and creative (one of the little objects listed above would be perfect)
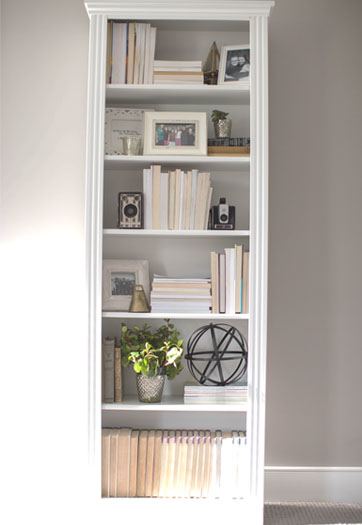
Step 8: Last step! It’s always nice to have some greenery. Makes things look fresh and alive! Whether they’re fake or real, put em up there!
Now, step back and take a look. Do your eyes immediately go to a particular place on the bookcase that just doesn’t look right? Rearrange, rearrange, rearrange. Don’t be afraid to move things around till you’re satisfied.
Also, another helpful resource is Pinterest. Go and gather some ideas and inspiration from pictures of nicely styled shelves. You can refer back to these pictures to give you a little guidance if you feel “stuck” at any time.
Wanna quick overview? Lets speed style. 🙂
Now, take what you’ve learned and go to town! When you’re done, post a picture on Insta and tag us at @thechrisandclaudeco so we can see your beautiful work.
with love, Claude