
Answer: Create a mood board that you both love which will set the direction for your project.
We think a mood board plays such a crucial role in our design process and helps to ensure you (and your spouse) design a space you both love. Read on to discover how to create this amazing tool.
What is a mood board?
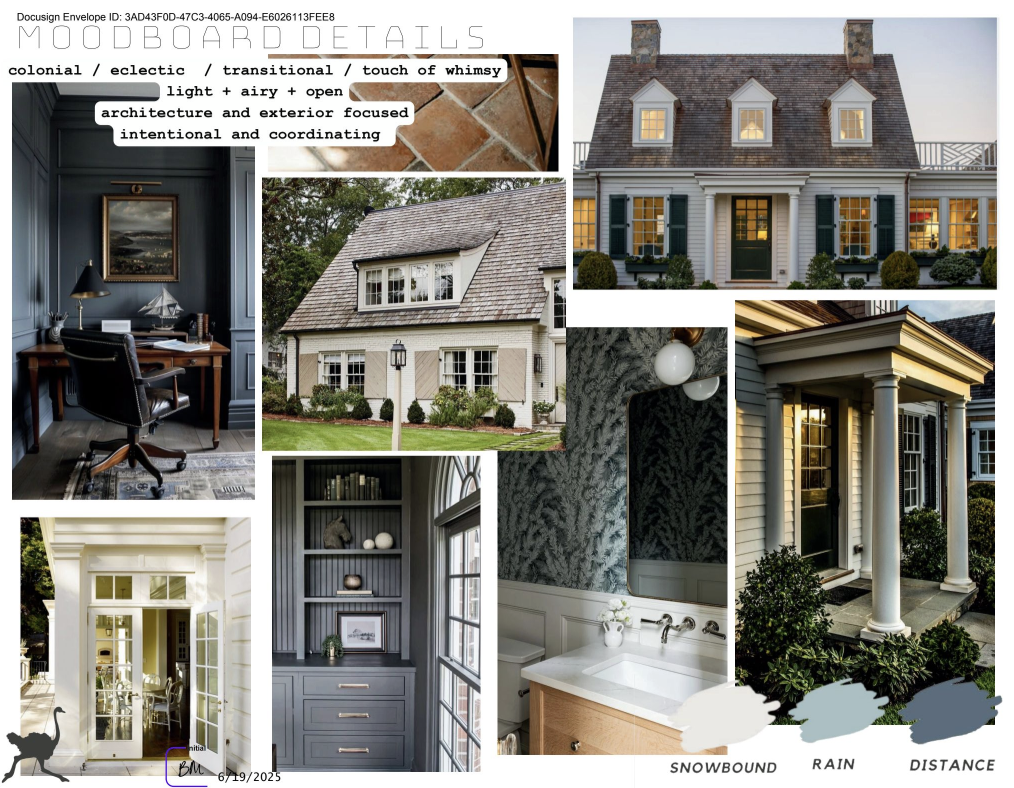
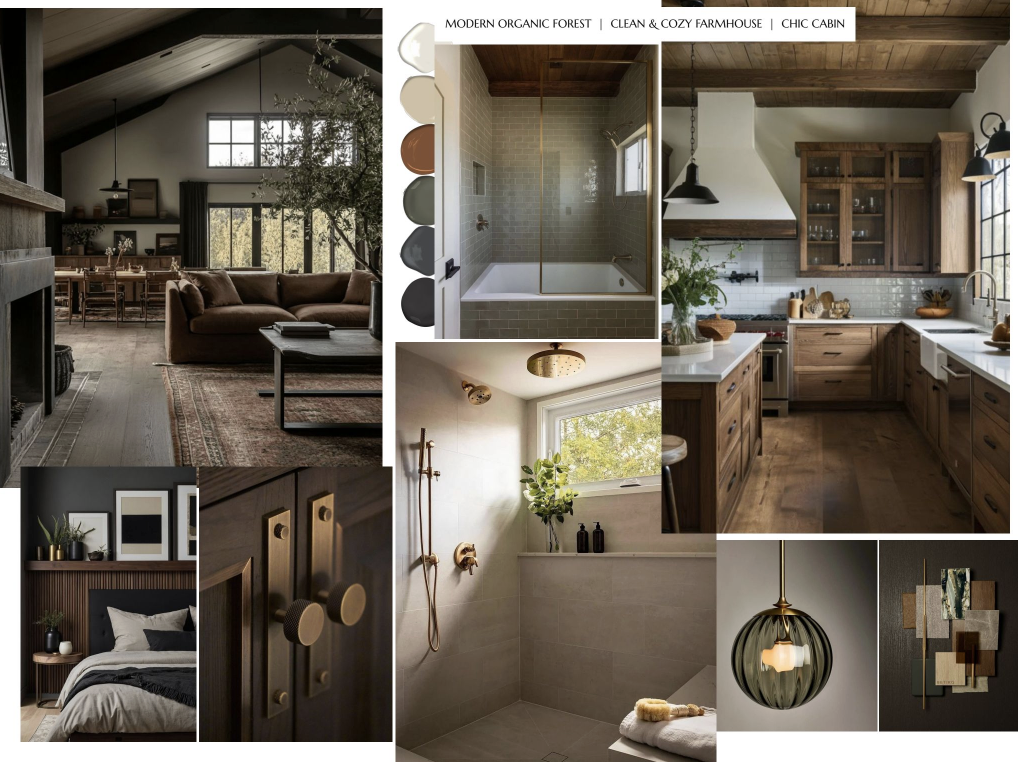
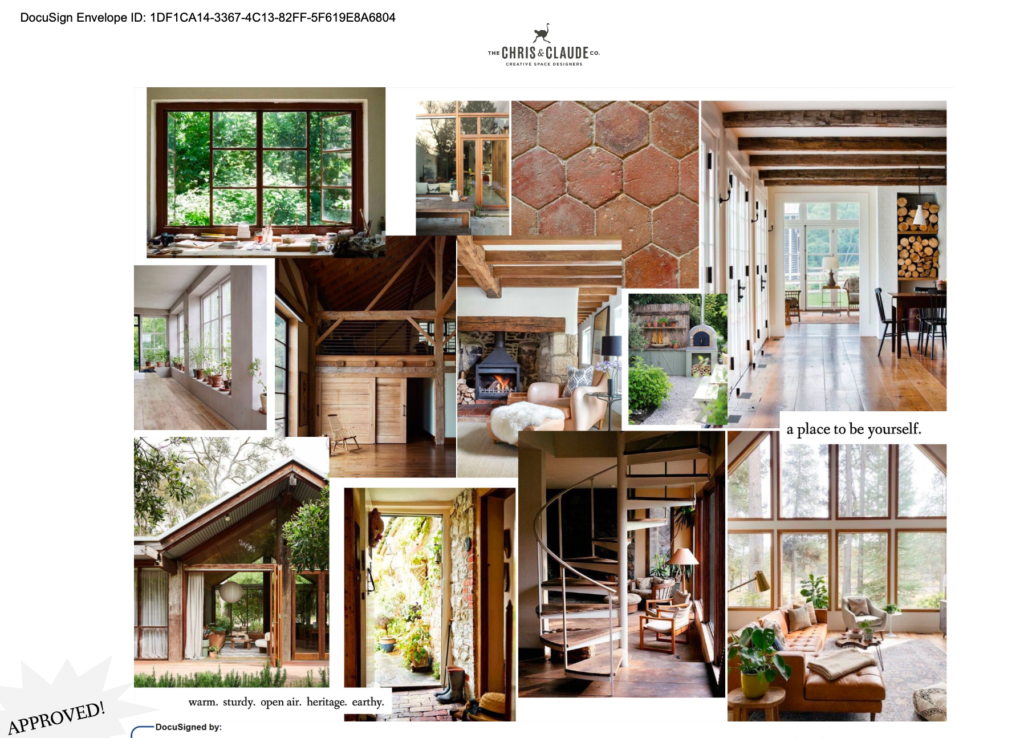
Our definition of a mood board is a carefully curated collage of photographs (usually arranged on an 8.5″ x 11″ sheet), describing words, and a color palette that produce in you the emotions and feelings that you want to have when you walk into your newly design space.
How do you create a mood board?
Step 1 – The first step in creating a mood board is pretty easy. It’s just a matter of collecting as many images that you like and saving them.
Pinterest is perfect for this but you can save your photos in whatever format you like. If you like a photo, save it. If you are designing with your spouse make sure they like it too – hopefully there are some pictures that you both like. From our experience almost every couple has an overlap zone where there are inspirational images that you both like.
Quick Tip: If you can select photos that were taken in a space somewhat similar to the space you are designing, this will help you in the next steps. For example, if your home has 8′ flat ceilings and you know you won’t be changing this, don’t select a lot of photos that have 20′ vaulted ceilings.
Step 2 – Delete Delete Delete.
In the digital age we are exposed to more inspiration than our brains know what to do with, so in order to create a refined cohesive mood board you will probably have to cut out a lot of really great things in order to find the few best representative images. Look for themes in the photos you have selected and if there is a theme that seems to work, look for more photos in that vein.
Don’t over think this step. Design from your gut and not your head. Your head will get engaged later in the design process, but not yet. If it feels right, stick with it. Keep deleting and curating based on common themes until you have selected your top 10-15 photos.
The fewer photos the better but make sure it still tells your story.
Keep an eye out for a compass photo. Sometimes there will be a photo that captures everything you are dreaming of in one image. You won’t always find this photo but if you do, this is a super powerful tool for guiding your process.
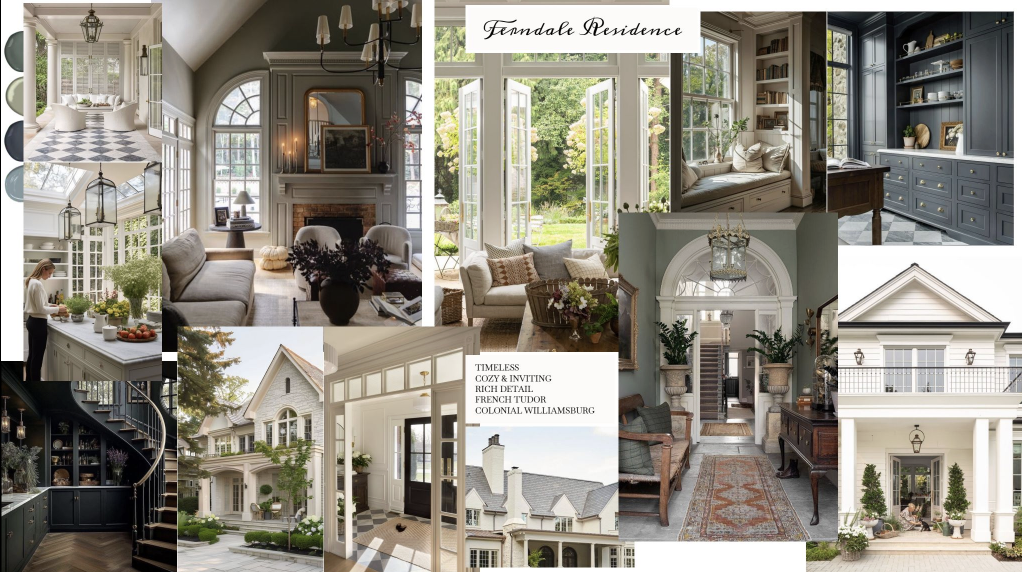
Step 3 – Arrange the photos in a collage. Feel free to overlap and resize the photos however you like but we usually pull our best images to the front and make them the largest. Other supporting photos may be placed to the sides and be smaller.
Pick your top 3-5 color swatches and paste them somewhere. Pick a collection of 2-4 words that you want to use to describe the space and put them in a font that you like and then add them to the collage.
Step 4 – Sleep on it and then look at what you have created and monitor what you feel in the first few seconds of looking at your mood board. Is it what you want? Is it too moody? To cluttered? To stiff? We have a questionnaire that we go over with our clients to help them articulate their feedback to us.
Keep playing with different images and arrangements until you both really like what you have. We always get our clients to sign off on the mood board once it is just the way they like it which helps to really solidify this step of the process and allows it to be the “set compass” for future decisions.
If we get stuck later in the design process, we come back to the mood board and ask, “What does the mood board tell us?” We can usually gain insights from the images on the mood board to guide our decision making.
The key to you and your spouse having a unified design theme is to have a unified mood board. If you create a mood board you both love, you will have set your compass in a direction that will lead you to a space you will both love.